Discover the ultimate Lemon Bars recipe that brings bright, sunshine flavor to your kitchen! This delightful dessert features a perfect balance of sweet and tart, all resting on a buttery shortbread crust. We make baking simple, and this easy-to-follow guide ensures you create irresistible lemon squares every time. Get ready for a classic treat that everyone will adore.
Why You’ll Love These Lemon Bars
You will quickly fall in love with these delightful citrus squares. They are a perfect example of making baking simple for busy parents and beginners.
- Effortlessly Delicious: These Lemon Bars offer simple steps and always deliver impressive results.
- Bright Citrus Flavor: Each bite is packed with incredibly fresh lemon tang, brightening any day.
- Perfectly Balanced: Enjoy a sweet, creamy lemon filling perfectly contrasted by a buttery, tender shortbread crust.
- Crowd-P\leasing Classic: This universally loved dessert is a go-to for gatherings, sure to disappear quickly.
- Make-Ahead Friendly: Prepare these Lemon Bars in advance for effortless entertaining or a convenient treat throughout the week.
- Versatile Treat: They are great for any occasion, fitting perfectly from casual family dinners to elegant celebrations.
Ingredients
Gather your ingredients to create these irresistible lemon bars. Using quality components ensures the best flavor and texture in your finished dessert. This recipe focuses on fresh and simple items, making the process straightforward for any baker.
For the Shortbread Crust:
- All-purpose flour: 2 ½ cups (300g)
- Powdered sugar: ⅔ cup (66g)
- Salt: ½ tsp
- Unsalted butter: 12 tbsp (170g), melted
For the Lemon Filling:
- Granulated sugar: 3 cups (600g)
- Lemon zest: 3 tbsp (from 3 lemons)
- All-purpose flour: ½ cup (60g)
- Large eggs: 8, room temperature
- Fresh lemon juice: 1 cup (240mL)
For Dusting:
- Powdered sugar: more for dusting
Notes & Substitutions
Fresh Lemons Only: Always emphasize using fresh lemon juice and zest. Bottled juice lacks the vibrant flavor and zest essential for authentic lemon bars. Fresh lemons make a huge difference. Research highlights how fresh lemons contribute a more vibrant and authentic taste to baked goods than bottled alternatives: the advantages of fresh lemons in baking.
Unsalted Butter: Unsalted butter gives you control over the overall saltiness of your recipe. This ensures a consistent, delicious result every time.
Salted Butter: If you only have salted butter, reduce the added salt in the crust by ¼ teaspoon. This prevents your crust from becoming too salty.
Other Citrus: Feel free to experiment with other citrus fruits. Try using orange juice and zest for a sweeter bar, or lime for a more intense tang.
Vanilla Extract: You can add a splash of vanilla extract to the crust dough. This enhances the overall flavor profile without overpowering the lemon.
Zest Incorporation: If you do not have a food processor, finely mince the lemon zest with a sharp knife. Then, simply mix it thoroughly with the granulated sugar in a bowl or bag.
Equipment
You will need a few standard kitchen tools to prepare these delightful lemon squares. Having your equipment ready makes the baking process smooth and enjoyable.
- 9×13 inch baking dish
- Parchment paper
- Mixing bowls (large)
- Whisk
- Food processor (optional, for zesty sugar)
- Citrus juicer
- Sharp knife
Instructions
Follow these simple steps to create perfect lemon bars from scratch. This guide makes baking accessible for everyone, ensuring a delicious outcome.
- Prepare Baking Dish: Preheat your oven to 350°F (175°C). Line a 9×13 inch baking dish with parchment paper, leaving an overhang on the sides. This ensures easy lifting and removal later.
- Make Crust Dough: In a large mixing bowl, whisk together 2 ½ cups (300g) of all-purpose flour, the powdered sugar, and salt. Pour in the melted unsalted butter and mix until the dry ingredients are just moistened and a crumbly dough forms. You can also use a stand mixer with a paddle attachment for this step.
- Press Crust: Sprinkle the dough evenly into your prepared baking pan. Use the bottom of a glass or your fingers to press it down into a flat, compact layer across the bottom.
- Bake Crust: Transfer the pan to the preheated oven. Bake the crust for about 20 minutes, or until it turns a light golden brown color around the edges.
- Infuse Sugar: While the crust bakes, combine the 3 cups (600g) of granulated sugar and 3 tablespoons of fresh lemon zest in a food processor. Pulse until the zest is fully incorporated and the sugar takes on a light yellow hue. If you do not have a food processor, mince the zest finely and mix it thoroughly with the sugar in a bowl.
- Mix Filling Dry: In a separate large bowl, combine the zesty sugar mixture with the remaining ½ cup (60g) of all-purpose flour. Whisk these dry ingredients together thoroughly to remove any lumps. Sifting is optional but might clog with zest.
- Add Wet Ingredients: Pour the 1 cup (240mL) of fresh lemon juice into the bowl with the dry filling ingredients. Add the 8 large, room temperature eggs. Whisk all the ingredients together very well until the mixture is completely smooth and combined.
- Pour Filling: Carefully pour the lemon filling mixture directly over the warm, pre-baked shortbread crust in the pan. The warmth helps create a smooth transition.
- Bake Bars: Place the pan back into the oven. Bake for approximately 25 minutes, rotating the pan halfway through the bake time for even cooking. The center should be just set with a slight jiggle, and the edges should appear firm.
- Cool & Chill: Remove the pan from the oven and allow the lemon bars to cool completely at room temperature for at least one hour. Then, transfer the pan to the refrigerator and chill for a minimum of two hours. Chilling is essential for the bars to set properly.
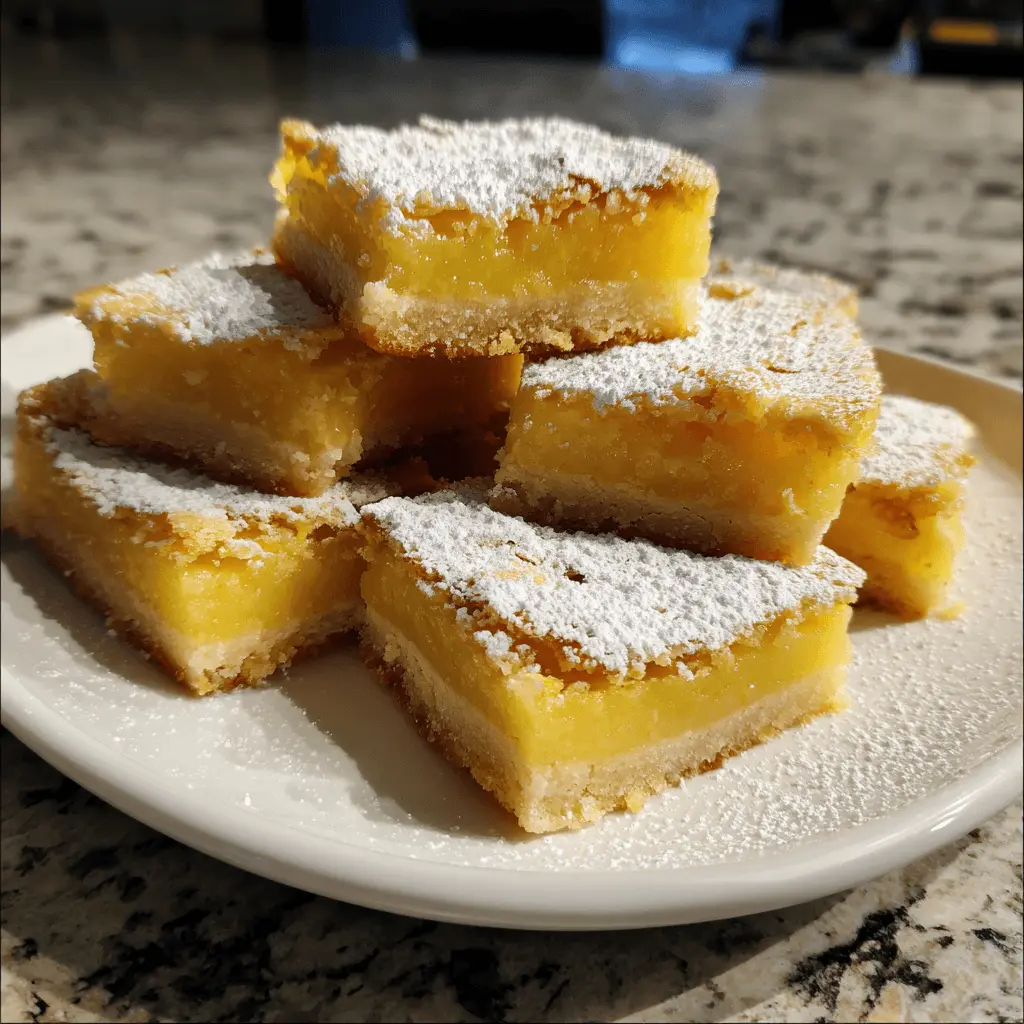
- Finish & Serve: Once thoroughly chilled, lift the parchment paper to remove the entire block of lemon bars from the pan. Dust generously with additional powdered sugar. Using a clean, sharp knife that has been dampened with water, slice the bars into your desired sizes. Wipe and re-wet the knife after each cut for the cleanest slices.
Pro Tips & Troubleshooting
Achieving perfect Lemon Bars is easy with these helpful hints. Follow these suggestions to ensure your tangy dessert turns out beautifully every time.
- Always Use Fresh Citrus: This is crucial for bright, authentic lemon flavor. Avoid bottled juice for these bars.
- Line the Pan: Parchment paper makes removing the entire slab of bars effortless. It also ensures clean cuts and easy cleanup.
- Don’t Overbake: The filling will continue to set as it cools. Overbaking leads to a rubbery texture, so remove it when the center barely jiggles.
- Chill Thoroughly: This is essential for firm, sliceable bars. Rushing this step results in a messy, unset dessert.
- Clean Cuts: A sharp, damp knife, wiped clean after each slice, prevents the filling from sticking. This gives you perfectly neat squares.
- Room Temperature Eggs: Using room temperature eggs ensures your filling mixes smoothly and evenly. Cold eggs can cause separation.
- Food Processor for Zest: Pulsing zest with sugar maximizes lemon flavor. The oils infuse the sugar beautifully for intense taste.
Serving, Storage, & Variations
These delightful lemon treats are perfect for any occasion. Proper handling ensures they stay fresh and delicious.
Serving Suggestions:
Dust your homemade Lemon Bars generously with powdered sugar just before serving. You can serve them chilled directly from the refrigerator, or let them come closer to room temperature for a softer bite. They make an excellent dessert for brunches, potlucks, or an afternoon snack.
Storage Instructions:
- Refrigerate lemon bars if you do not consume them within a few hours. This preserves their freshness and firm texture.
- Store the cut bars in an airtight container in the refrigerator for up to 5 days. Layer them with parchment paper to prevent sticking.
Freezing Instructions:
- To freeze, first place cut bars on a baking sheet and freeze until solid. This prevents them from sticking together.
- Wrap individual bars tightly in plastic wrap, then place them in a freezer-safe bag or container. They will store well for up to 3 months.
- Thaw frozen bars at room temperature for an hour, or overnight in the refrigerator, before dusting and serving. Understanding proper food safety practices is essential when storing and thawing baked goods to maintain quality and prevent spoilage: essential food safety tips for baking and storage.
Flavor Variations:
- Experiment with other citrus fruits for unique flavors. Try using lime juice and zest for a Key Lime Bar twist, or orange for a sweeter, milder profile.
- Add a splash of vanilla extract to the crust dough. This simple addition provides an extra layer of depth and warmth to the buttery shortbread.
Nutrition
Enjoying homemade treats means you control the ingredients. These classic Lemon Bars offer a delightful balance of energy and flavor.
| Nutrient | Amount |
|---|---|
| Serving Size | 1 bar |
| Calories | 385 kcal |
| Carbohydrates | 66 g |
| Protein | 6 g |
| Fat | 12 g |
| Saturated Fat | 7 g |
| Cholesterol | 111 mg |
| Sodium | 113 mg |
| Fiber | 1 g |
| Sugar | 46 g |
| Vitamin A | 407 IU |
| Vitamin C | 8 mg |
| Calcium | 22 mg |
| Iron | 2 mg |
Please note: Nutritional information is an estimate based on ingredients and standard preparations.
FAQ
Got questions about making these delightful lemon treats? We have answers to help you bake with confidence.
- Do I need to refrigerate lemon bars?
Yes, refrigerate them for optimal freshness and texture. If left out longer than a few hours, the filling can soften too much. - How do I know if lemon bars are set?
The edges should appear firm and lightly golden, while the center will have a slight, barely perceptible jiggle. The filling will continue to set as it cools. - Can lemon bars be made a day ahead?
Absolutely! Making these Lemon Bars a day ahead is ideal. They are much easier to cut into neat squares when fully chilled overnight. - How do you cut lemon bars cleanly?
Use a sharp, damp knife for the cleanest cuts. Wipe and re-wet the knife after every single slice to prevent sticking and ensure pristine edges.
Conclusion
You now have everything you need to bake the most delicious Lemon Bars right in your own kitchen. This recipe proves that making baking simple leads to truly impressive results. Embrace the bright, zesty flavors and the satisfying contrast of a tangy filling with a buttery crust. We encourage you to try this classic recipe soon and share your delightful experience with us!