This chocolate pudding recipe is a true classic, bringing comforting flavor to any occasion. Forget store-bought mixes; making your own is incredibly easy and far more rewarding. You’ll achieve a remarkably rich, creamy texture and a deep chocolate taste right on your stovetop. This quick method makes a delightful dessert for busy parents and beginners alike. Get ready to enjoy a simple, time-saving treat!
Why You’ll Love This Chocolate Pudding
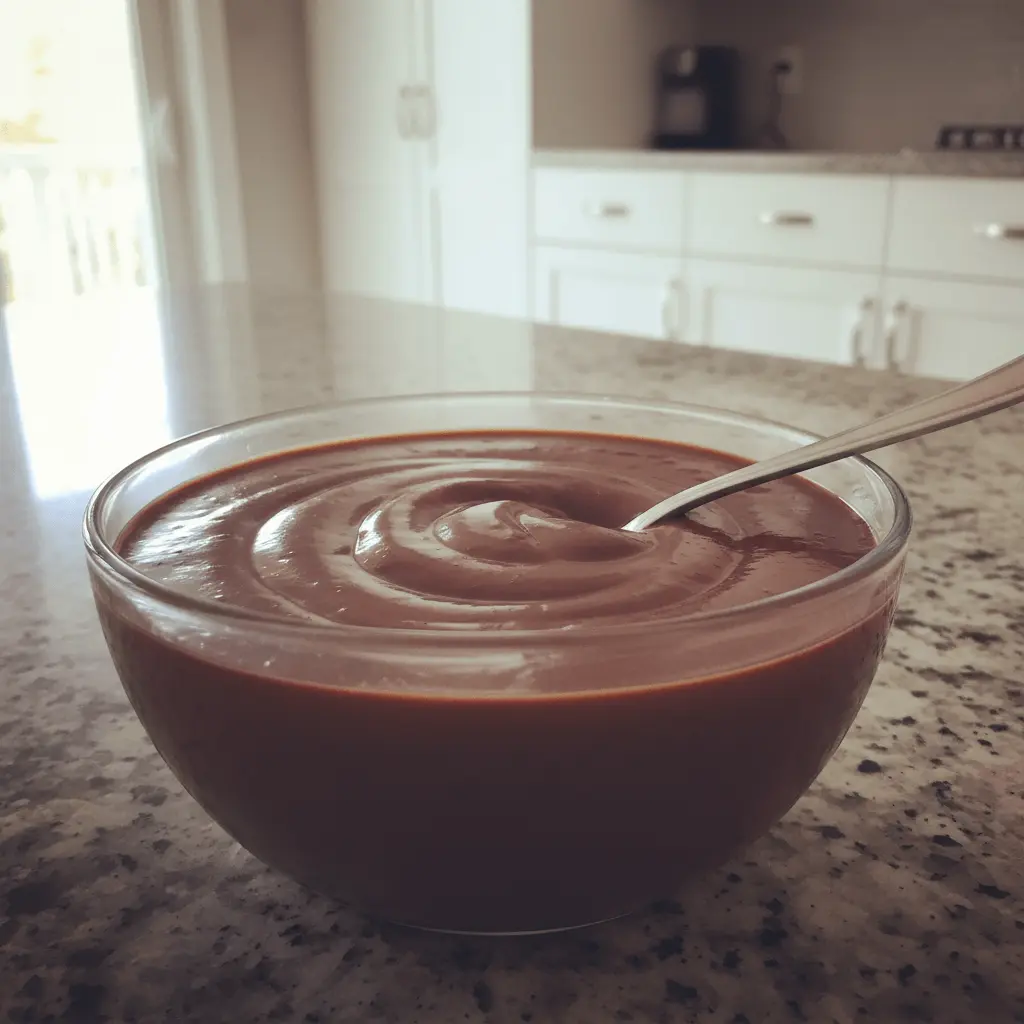
This homemade chocolate pudding recipe will quickly become a family favorite.
- It boasts an irresistible creamy and smooth texture that melts in your mouth.
- You’ll savor the truly rich, satisfying chocolate taste, far superior to instant versions.
- The recipe is incredibly simple, requiring only basic pantry ingredients you likely have on hand.
- Preparation is remarkably quick, taking only about 10 minutes on the stovetop.
- This dessert is wonderfully versatile, perfect for everyday treats or special gatherings.
- Kids adore this classic, bringing a touch of nostalgic charm to your table.
- It’s an excellent make-ahead option, chilling beautifully until you are ready to serve.
Ingredients You’ll Need
Gather these simple ingredients to create your luscious homemade chocolate pudding recipe. Each component plays a vital role in achieving the perfect balance of flavor and texture.
The fat content in dairy products plays a significant role in achieving that desired velvety texture, helping create a melt-in-your-mouth experience.
- 4 ½ cups milk: Whole milk or 2% is recommended for best creaminess.
- 1 ⅓ cup granulated sugar: Provides sweetness and balances the cocoa.
- ⅔ cup unsweetened cocoa powder: Delivers the essential rich chocolate flavor.
- ⅓ cup cornstarch: Acts as the primary thickening agent for a smooth consistency.
- Pinch of salt: Enhances and deepens the chocolate notes.
- 3 tablespoons unsalted butter: Adds richness and a velvety mouthfeel.
- 1 teaspoon vanilla extract: Boosts overall flavor complexity.
Notes & Substitutions
Cornstarch is crucial for thickening; it gives the pudding its silky smooth texture. For milk, whole milk provides the creamiest result, but 2% works well too. You can also use non-dairy options like almond or oat milk for a similar consistency, though the flavor will subtly change. For a deeper chocolate experience, use Dutch-processed cocoa powder. To make this chocolate pudding recipe dairy-free, substitute plant-based milk and a vegan butter alternative. A dash of instant espresso powder can also enhance the chocolate flavor.
Equipment
Preparing this delicious pudding requires just a few basic kitchen tools.
- Medium heavy-bottomed saucepan: Essential for even heat distribution and preventing scorching.
- Whisk: Key for thoroughly combining ingredients and preventing lumps.
- Heat-resistant serving bowls/ramekins: Perfect for portioning and chilling the pudding.
- Plastic wrap: Used to cover the pudding directly and prevent a “skin” from forming.
Step-by-Step Instructions
Follow these clear steps to make the perfect homemade chocolate pudding. This chocolate pudding recipe comes together quickly with careful attention to detail.
Prep the Dry Ingredients
In your medium heavy-bottomed saucepan, combine the granulated sugar, unsweetened cocoa powder, cornstarch, and a pinch of salt. Use a whisk to thoroughly mix these dry ingredients together. This step is crucial for preventing any lumps in your finished pudding. Ensure the mixture is well-incorporated before moving on.
Combine with Milk
Gradually pour the cold milk into the dry ingredient mixture in the saucepan. While adding the milk, continuously whisk the contents until everything is completely smooth. Take your time here to ensure no dry pockets remain. A smooth initial mixture leads to a silky smooth pudding.
Cook the Pudding
Place the saucepan over medium heat on your stovetop. Begin whisking the mixture constantly from this point. Continue whisking without stopping until the pudding starts to visibly thicken and just reaches a low boil. You will see bubbles slowly breaking on the surface. Do not allow it to boil vigorously or for too long, as this can break down the starch and prevent proper thickening.
Finish the Pudding
Immediately remove the saucepan from the heat once the pudding has thickened and boiled. Quickly stir in the unsalted butter until it is fully melted and incorporated. Then, add the vanilla extract, stirring it through for a final burst of flavor. The residual heat will melt the butter and meld the flavors beautifully.
Cool and Chill
Carefully pour the hot chocolate pudding into your chosen heat-resistant serving dishes or ramekins. To prevent a “skin” from forming on the surface as it cools, press a piece of plastic wrap directly onto the surface of the warm pudding. This creates an airtight seal. Chill the pudding in the refrigerator for at least 2-4 hours, or until it is completely set and thoroughly cold.
Serve & Enjoy
Once the pudding is firm and chilled, remove the plastic wrap. Serve your delicious chocolate pudding recipe cold, or even slightly warm if you prefer. Add your favorite toppings to enhance the experience before diving in.
Pro Tips for Perfect Pudding
Achieving perfect pudding is easy with a few key techniques.
Understanding the food science behind this phenomenon can help you achieve perfectly smooth results every time.
- Prevent skin formation: Always cover the warm pudding with plastic wrap pressed directly onto its surface.
- Avoid lumps: Thoroughly whisk dry ingredients before adding milk, then whisk constantly while cooking.
- Achieve ideal thickness: Cook over medium heat, whisking constantly, until it thickens and just boils. Don’t overcook.
- Enhance flavor: Opt for high-quality unsweetened cocoa powder for a richer chocolate taste.
- Control sweetness: Taste the mixture before cooking and adjust sugar slightly if you prefer more or less sweet.
- Troubleshoot watery pudding: If your pudding is too thin, return it to the heat and whisk for a minute or two longer, ensuring it reaches a gentle boil.
Serving, Storage, and Variations
This versatile chocolate pudding recipe offers many delightful possibilities.
Serving Suggestions
Serve your homemade pudding with a generous dollop of freshly whipped cream. Add a scoop of vanilla bean ice cream for an extra indulgent treat. Garnish with fresh raspberries, sliced strawberries, or delicate chocolate shavings. For a delightful textural contrast, crumble some shortbread cookies, graham crackers, or chopped toasted nuts over the top.
Storage Instructions
Store leftover chocolate pudding tightly covered with plastic wrap, pressed directly onto the surface, in the refrigerator. It remains fresh and delicious for 5-7 days. Always keep it chilled for optimal taste and safety.
Freezing & Pudding Pops
While you can freeze pudding, the texture often changes after thawing, becoming slightly grainy due to the cornstarch. For a delightful frozen treat, try making pudding pops! Pour the cooled pudding into ice pop molds and freeze until solid. This is a fun way to enjoy a chilly version of this classic dessert.
Recipe Variations
- Mocha: Stir in 1 teaspoon of instant espresso powder or strong brewed coffee with the milk for a coffee-chocolate kick.
- Spiced: Add ¼ teaspoon of ground cinnamon or a tiny pinch of cayenne pepper for warmth and depth.
- Mint Chocolate: Use ½ to 1 teaspoon of mint extract along with the vanilla for a refreshing flavor.
- Orange: Incorporate 1 teaspoon of fresh orange zest or a few drops of orange extract for a bright, citrusy note.
Nutrition Information
Below is an estimated nutritional breakdown per serving for this chocolate pudding recipe. Please note these values are approximate and can vary based on specific ingredients and portion sizes.
| Nutrient | Amount Per Serving (estimated) |
|---|---|
| Calories | 320 kcal |
| Total Fat | 8g |
| Saturated Fat | 5g |
| Cholesterol | 25mg |
| Sodium | 110mg |
| Total Carbohydrates | 58g |
| Dietary Fiber | 3g |
| Total Sugars | 45g |
| Protein | 7g |
Disclaimer: Nutrition information is an estimate based on ingredients and preparation. Actual values may vary.
Frequently Asked Questions (FAQ)
Why is my homemade chocolate pudding runny?
Your pudding might be runny if it didn’t reach a full boil or wasn’t cooked long enough. Make sure to whisk constantly until it visibly thickens and just bubbles.
How do I prevent a “skin” from forming on my pudding?
To avoid a skin, simply press plastic wrap directly onto the surface of the warm pudding before chilling it. This creates a barrier.
Can I use dairy-free milk in this recipe?
Yes, you can use dairy-free milks like almond, oat, or soy milk, though the flavor and richness will be slightly different. Ensure your butter is also dairy-free for a fully vegan chocolate pudding recipe.
Is this recipe gluten-free?
Yes, this recipe is naturally gluten-free as it uses cornstarch as the thickener instead of flour. All ingredients listed are typically gluten-free.
Can chocolate pudding be made ahead of time?
Absolutely! This pudding is perfect for making ahead. Prepare it up to 5-7 days in advance and store it covered in the refrigerator.
Conclusion
This ultimate homemade chocolate pudding recipe proves that classic comfort desserts are often the simplest to make. With its rich, deep chocolate flavor and incredibly smooth, creamy texture, it’s a delightful treat for any occasion. We encourage you to try this easy, beginner-friendly recipe at home and rediscover the joy of homemade pudding. Enjoy this timeless dessert, and please share your experience with us!
[1] Understanding how fat contributes to creamy mouthfeel
[2] Learn more about why skin forms on cooked milk dishes