Craving a delightful treat that’s both fun to make and incredibly delicious? Look no further than these chocolate cake pops! Forget the store-bought versions; crafting them from scratch ensures a rich, moist, and intensely chocolatey experience that truly stands out. You’ll love the superior taste and texture of these homemade gems. We even have a video tutorial to guide you every step of the way!
Why You’ll Love This Chocolate Cake Pops Recipe
This recipe is a game-changer for anyone wanting to make impressive treats.
- You’ll create a rich, intense chocolate flavor from scratch, no box mix or canned frosting needed.
- Enjoy the perfect fudgy, moist texture in every bite of these delightful cake pops.
- They are a fun, festive, and customizable treat, ideal for any occasion.
- These chocolate cake pops are sure to impress at parties, potlucks, or as thoughtful homemade gifts.
- You can easily freeze them beautifully for enjoying later, making party prep a breeze.
Ingredients
Making delicious chocolate cake pops starts with quality ingredients. This recipe builds rich flavors from the ground up, ensuring every bite is a delightful experience.
For the Chocolate Cake
- 1 cup (125g) all-purpose flour: Measure properly for best results. The Home Baking Association emphasizes that precise measurements are fundamental for achieving consistent and successful baking outcomes.
- 1 cup (200g) granulated sugar: Provides essential sweetness and moisture.
- 6 Tablespoons (32g) unsweetened natural cocoa powder: Delivers deep chocolate flavor to the cake.
- 1/2 teaspoon baking soda: Acts as a leavening agent for a tender crumb.
- 1/4 teaspoon salt: Balances and enhances all the flavors.
- 1/2 cup (120ml) canola, vegetable, or melted coconut oil: Keeps the cake incredibly moist.
- 2 large eggs, at room temperature: Binds ingredients together for a cohesive batter.
- 1 teaspoon pure vanilla extract: Adds a lovely aromatic depth to the chocolate.
- 1/2 cup (120ml) hot water: Blooms the cocoa powder and adds necessary moisture.
For the Chocolate Frosting
- 6 Tablespoons (85g) unsalted butter, softened to room temperature: Forms a creamy, rich base for the frosting.
- 3/4 cup (90g) confectioners’ sugar: Sweetens the frosting to perfection.
- 1/2 cup (41g) unsweetened natural or Dutch-process cocoa powder: For an intense chocolate flavor in the frosting.
- 2–3 teaspoons heavy cream or milk: Adjusts the consistency, making it smooth and spreadable.
- 1/2 teaspoon pure vanilla extract: Further enhances the overall chocolate experience.
For the Coating & Decoration
- 24 ounces (680g) candy melts or semi-sweet chocolate bars: Creates the perfect dippable coating.
- Sprinkles (optional): For a festive and fun finishing touch.
Notes & Substitutions
Measure flour by spooning it into a measuring cup, then leveling with a knife for accuracy. You can use natural cocoa for a classic chocolate flavor, or Dutch-process for a darker, milder taste. For the coating, candy melts are easiest to work with for a smooth finish, but good quality semi-sweet chocolate bars also work wonderfully. If your melted chocolate is too thick, thin it with a teaspoon of coconut oil. Always use room temperature eggs and butter for a consistent, smooth batter and frosting.
Equipment
Gathering your tools ahead makes baking simple. You will need a 9-inch round or square baking pan, an electric mixer (stand or handheld), large and medium mixing bowls, a whisk, and a rubber spatula. Also, have your measuring cups and spoons ready. A lined baking sheet, lollipop sticks, and a 2-cup liquid measuring cup are essential for assembly. Finally, a styrofoam block or an empty box helps dry your finished cake pops upright.
Instructions
Creating these delightful chocolate cake pops involves a few simple steps. Follow along carefully for the best results!
- Prepare cake: Preheat your oven to 350°F (177°C). Lightly grease a 9-inch round or square baking pan.
- Mix dry ingredients: In a large bowl, whisk together the flour, granulated sugar, cocoa powder, baking soda, and salt. Set this aside.
- Mix wet ingredients: In a separate medium bowl, whisk the oil, eggs, and vanilla extract until well combined.
- Combine cake batter: Pour the wet ingredients into the dry ingredients. Add the hot water, then whisk everything together until the batter is smooth with no dry pockets.
- Bake cake: Pour the batter evenly into your prepared pan. Bake for 25–27 minutes, or until a toothpick inserted into the center comes out clean.
- Cool cake: Remove the cake from the oven and allow it to cool completely in the pan on a wire rack. This is crucial before moving on.
- Make frosting: Using an electric mixer, beat the softened butter on medium speed until creamy, about 2 minutes. Scrape down the bowl as needed.
- Add frosting ingredients: To the butter, add the confectioners’ sugar, cocoa powder, 2 teaspoons of heavy cream or milk, and vanilla extract. Beat on low speed until combined.
- Beat frosting: Increase the mixer speed to high and beat for 3 minutes until the frosting is fluffy and well-combined. Add an extra teaspoon of cream or milk if it seems too thick.
- Crumble cake: Crumble the completely cooled cake directly into the bowl with the frosting. Ensure there are no large lumps remaining.
- Mix cake and frosting: Turn the mixer on low speed and beat the cake crumbles and frosting together until thoroughly combined and a moist dough forms.
- Roll cake balls: Measure out 1 scant tablespoon (approximately 20g) of the cake mixture. Roll it firmly into a smooth ball. Place the finished cake balls on a lined baking sheet.
- Chill cake balls: Refrigerate the cake balls for at least 2 hours, or freeze for 1 hour, until they are very firm. This prevents cracking.
- Melt coating: Melt your candy melts or chocolate in a 2-cup liquid measuring cup (perfect for dipping). Microwave in 20-second increments, stirring well after each, until completely smooth.
- Cool coating slightly: Let the melted coating cool for a few minutes. If it’s too hot, the cake pops may crack.
- Prepare sticks: Take a lollipop stick and dip one end about 1/2 inch into the cooled coating. Insert this coated end halfway to three-quarters into a chilled cake ball.
- Dip cake pops: Dip the entire cake ball into the coating, ensuring the coating covers where the stick meets the cake.
- Remove excess coating: Gently tap the stick against the edge of the measuring cup to allow any excess coating to drip off smoothly.
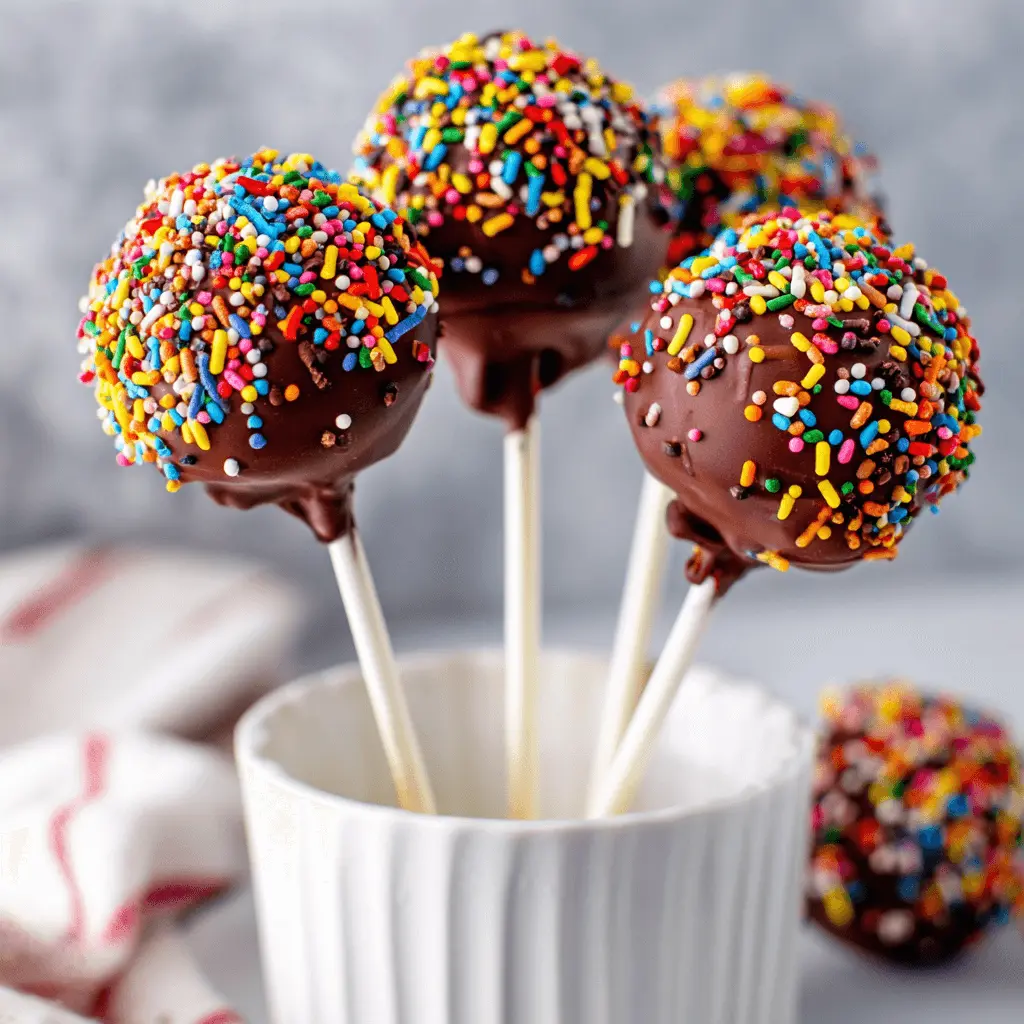
- Decorate: Immediately add sprinkles or any other decorations before the coating sets.
- Dry cake pops: Insert the stick upright into a styrofoam block or an empty box to dry completely.
- Set and store: Allow the coating to fully set at room temperature (about an hour). Then, refrigerate your finished chocolate cake pops until you are ready to serve them.
Pro Tips & Troubleshooting
To prevent cracking, ensure your cake balls are very cold and your coating isn’t too hot when dipping. For advice on achieving perfectly smooth and crack-free coatings, King Arthur Baking offers essential tips for working with dipping chocolate. Achieve a smooth coating by thinning slightly with a teaspoon of vegetable oil if it’s too thick. Stick to a 1 scant tablespoon (20g) cake ball size for stability on the sticks. Embrace sticky hands; it’s part of the fun! Work in small batches to keep remaining cake balls cold. Always dip lollipop stick ends in coating first to secure them. A deep, narrow measuring cup is the best dipping tool. If cake crumbles, ensure it’s mixed thoroughly with frosting to be moist enough.
Serving, Storage & Variations
These delightful chocolate cake pops are perfect for any occasion! Serve them at birthday parties, holiday gatherings, or wrap them individually for thoughtful gifts. Store leftover cake pops in an airtight container in the refrigerator for up to 1 week. For longer storage, you can freeze undipped cake balls for up to 2 days, or fully finished cake pops for up to 6 weeks. Thaw frozen pops overnight in the refrigerator before serving.
For a truffle-style treat, simply skip the sticks and use a spiral dipping tool to create elegant cake truffles. Explore flavor variations by trying a vanilla cake base with strawberry frosting, or switch up the cake and frosting types. When it comes to coating options, experiment with white chocolate, milk chocolate, or dark chocolate. Beyond sprinkles, get creative with decorations like chocolate drizzles, edible glitter, or mini chocolate chips for extra flair.
Nutrition Information
Please note that this nutrition information is an estimate. It can vary significantly based on specific ingredients, exact portion sizes, and any added toppings or substitutions. For precise details, consider using an online nutrition calculator with your chosen brands and measurements.
| Component | Amount (per serving) |
|---|---|
| Calories | ~180-220 |
| Total Fat | ~10-14g |
| Saturated Fat | ~5-8g |
| Cholesterol | ~20-30mg |
| Sodium | ~40-60mg |
| Total Carbs | ~20-25g |
| Sugars | ~15-20g |
| Protein | ~1-2g |
FAQ
- Can I use a box cake mix? While our recipe emphasizes scratch-made quality, you can use a box mix for convenience. Just ensure the cake is fully cooled before crumbling.
- Why are my cake pops cracking? Cracking often occurs if the cake balls aren’t cold enough or if the melted chocolate coating is too hot. Refer to our temperature tips in the Pro Tips section.
- How do I prevent cake balls from falling off sticks? Always dip the tip of the lollipop stick into melted coating before inserting it into the chilled cake ball. This acts as an edible glue.
- Can I make these ahead of time? Absolutely! Undipped cake balls can be refrigerated for up to 2 days, and finished chocolate cake pops freeze well for up to 6 weeks.
- What kind of chocolate should I use for coating? Candy melts are recommended for ease and a smooth finish. Alternatively, good quality semi-sweet chocolate with a touch of oil works too.
- Can I make these without sticks? Yes! Simply roll the cake mixture into balls and coat them as described, creating delicious cake truffles instead of pops.
- How many cake pops does this recipe make? This recipe yields approximately 40 cake pops, perfect for sharing or enjoying over time.
Conclusion
Crafting homemade chocolate cake pops is a truly rewarding experience, transforming simple ingredients into a delightful and impressive treat. You’ve now mastered the art of creating perfectly moist cake balls, rich frosting, and a flawless coating. These versatile little desserts are ideal for celebrations, thoughtful gifts, or simply indulging your sweet tooth. Don’t hesitate to dive in and make them your own! We can’t wait to see your wonderful creations and hear your feedback.