Discover the ultimate homemade chocolate cake recipe that promises a truly decadent experience. This easy-to-follow guide helps you create a moist, rich, and utterly delicious dessert, perfect for any celebration or a simple sweet craving. Forget complicated steps; this simple chocolate cake from scratch delivers impressive results every time, ensuring a delightful treat for everyone.
Why You’ll Love This Homemade Chocolate Cake
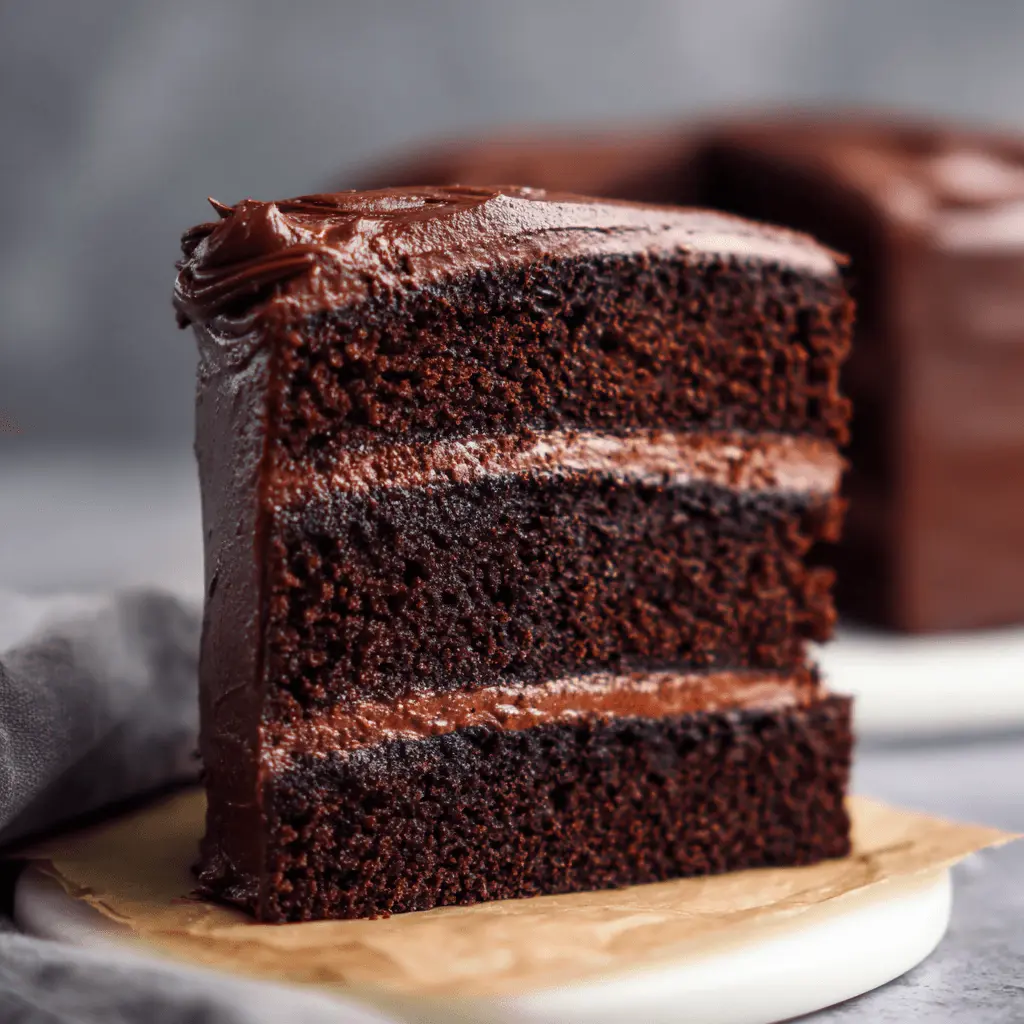
- Incredibly Moist and Rich Flavor: Each bite of this homemade chocolate cake melts in your mouth with deep cocoa notes.
- Simple, One-Bowl Preparation: You’ll love the minimal cleanup thanks to our straightforward mixing method.
- Impressive Results for Any Baker: Even beginners can achieve bakery-quality results with this reliable recipe.
- Versatile for Dietary Needs: Easily adapt this recipe to fit various dietary preferences, including gluten-free or dairy-free options.
- Customizable with Various Frostings: Pair this beautiful cake with classic chocolate buttercream, ganache, or a lighter cream cheese frosting.
- Crowd-Plasing Classic Dessert: This timeless easy chocolate cake recipe guarantees smiles and requests for seconds from family and friends.
Ingredients
Gather these simple ingredients to create your luscious homemade chocolate cake. You likely have most of these pantry staples already, making this a convenient choice for last-minute baking. Remember, quality ingredients make a difference in the final taste and texture of your perfect homemade chocolate cake.
- 2 cups all-purpose flour
- 2 cups sugar
- 3/4 cup unsweetened cocoa powder
- 2 teaspoons baking powder
- 1 1/2 teaspoons baking soda
- 1 teaspoon kosher salt
- 1 teaspoon espresso powder (homemade or store-bought)
- 1 cup milk (or buttermilk, almond, or coconut milk)
- 1/2 cup vegetable oil (or canola oil, or melted coconut oil)
- 2 large eggs
- 2 teaspoons vanilla extract
- 1 cup boiling water
- Chocolate Buttercream Frosting Recipe
Notes & Substitutions
Espresso powder deepens the chocolate flavor without making the cake taste like coffee. You can use standard milk or experiment with buttermilk, almond, or coconut milk for a different profile. Vegetable or canola oil works well, but melted coconut oil adds a subtle flavor. For a richer taste, substitute oil with melted unsalted butter. Always use room temperature eggs for a smoother batter and better emulsification. Understanding the science behind baking can enhance your results, as detailed by culinary experts, for instance, in this guide on how room temperature ingredients affect baking. We recommend Diamond Crystal kosher salt for consistent seasoning.
Equipment
You don’t need fancy tools to bake this incredible homemade chocolate cake. Essential kitchen items are all you need to achieve baking success. Gather these before you start for a smooth and efficient process.
- Two 9-inch round cake pans
- Large mixing bowl
- Whisk or stand mixer with paddle attachment
- Measuring cups and spoons
Instructions
Baking this homemade chocolate cake is straightforward when you follow these clear, step-by-step instructions. We break down each phase to ensure your baking experience is enjoyable and stress-free. Pay attention to preparation and mixing techniques for the best results. This method is designed to be beginner-friendly.
Prep Your Pans and Oven
Preheat your oven to 350°F (175°C). Properly prepare two 9-inch round cake pans. You can spray them thoroughly with baking spray, or butter and lightly flour them. Alternatively, brush them with a homemade chocolate pan release to prevent sticking. Proper pan preparation ensures your beautiful chocolate cake layers release cleanly after baking.
Mix Dry Ingredients
In your large mixing bowl, combine the all-purpose flour, granulated sugar, and unsweetened cocoa powder. Add the baking powder, baking soda, and kosher salt. Stir in the espresso powder until all the dry ingredients are uniformly combined. Whisking these together thoroughly eliminates lumps and ensures an even distribution of leavening agents throughout the easy chocolate cake recipe.
Incorporate Wet Ingredients
To the dry ingredients, add the milk, vegetable oil, large eggs, and vanilla extract. Begin mixing on medium speed using your whisk or stand mixer until the batter appears smooth. Do not overmix at this stage. Gradually add the boiling water to the batter, continuing to mix until it is just combined. The batter will be thin, which is normal for this incredibly moist homemade chocolate cake.
Bake and Cool
Divide the liquid batter evenly between your two prepared 9-inch cake pans. Place the pans into the preheated oven. Bake for 30-35 minutes, or until a wooden toothpick inserted into the center of the cakes comes out clean. Once baked, remove the cakes from the oven and let them cool in their pans on a wire rack for 10 minutes. Then, carefully invert the cakes onto the wire rack to cool completely before frosting. This prevents them from becoming soggy.
Frost Your Cake
While your cake layers are cooling, prepare your favorite chocolate buttercream frosting. A rich, creamy chocolate buttercream perfectly complements the deep flavor of this homemade chocolate cake. Once the cake layers are completely cooled to room temperature, generously frost them. Stack the layers, then cover the top and sides for a beautiful finish.
Pro Tips for the Perfect Homemade Chocolate Cake
- Use Good Quality Cocoa Powder: High-quality unsweetened cocoa powder is essential for a rich, deep chocolate flavor in your homemade chocolate cake.
- Don’t Overmix the Batter: Overmixing develops gluten, leading to a tougher cake. Mix until ingredients are just combined.
- Note Batter is Very Thin: This thin consistency is correct and contributes to the cake’s incredible moistness. Do not be alarmed.
- Test for Doneness with a Toothpick: Insert a wooden toothpick into the center of the cake; it should come out clean or with moist crumbs, not wet batter.
- Adjust for High Altitude: If baking at high altitudes, you may need to adjust leavening agents, liquids, or baking time.
- Ensure Ingredients are Room Temperature: Room temperature eggs and milk emulsify better, creating a smoother, more uniform batter for your classic chocolate cake.
Serving, Storage & Variations
This versatile homemade chocolate cake is delightful on its own, but also shines with simple additions or adaptations. Learn how to serve it for maximum enjoyment and keep it fresh for days.
Serving Suggestions
Serve this magnificent homemade chocolate cake with a handful of fresh berries like raspberries or strawberries for a touch of tartness. A scoop of premium vanilla ice cream or a dollop of freshly whipped cream makes for an extra special treat. Pair each slice with a hot cup of coffee or a cold glass of milk for the ultimate dessert experience.
Storage
Store your frosted homemade chocolate cake covered at room temperature for optimal freshness. An airtight cake dome or a large container works perfectly. This moist cake will remain fresh and delicious for 3 to 4 days, continuing to impress with its rich flavor.
Make Ahead & Freeing
You can easily bake the cake layers ahead of time. Wrap unfrosted, cooled cake layers tightly in plastic wrap, then aluminum foil, and freeze them for up to 2 months. Thaw frozen layers in the refrigerator overnight before frosting. For convenience, freeze individual frosted cake slices for future cravings, simply thaw at room temperature.
Variations
- Gluten-Free: Substitute the all-purpose flour with a high-quality gluten-free all-purpose flour blend.
- Dairy-Free: Use almond milk, coconut milk, or your favorite non-dairy milk alternative and a dairy-free oil.
- Egg-Free: Replace each egg with 1/4 cup unsweetened applesauce or a commercial egg replacer.
- Chocolate Cupcakes: Divide the batter into lined muffin tins and bake for 18-22 minutes.
- 9×13 Sheet Cake: Pour all the batter into a greased and floured 9×13 inch pan. Increase bake time to 35-40 minutes.
- Large Sheet Cake: Adapt the recipe by multiplying the ingredients for larger gatherings. Adjust bake time accordingly.
Nutrition Information
This nutrition information is provided for one serving of cake only, assuming 24 servings per recipe. Please note that frosting will add additional calories and other nutritional values. This makes for a delightful addition to any meal plan.
| Nutrient | Amount |
|---|---|
| Calories | 124 kcal |
| Carbohydrates | 27 g |
| Protein | 3 g |
| Fat | 1 g |
| Saturated Fat | 1 g |
| Cholesterol | 15 mg |
| Sodium | 178 mg |
| Fiber | 1 g |
| Sugar | 17 g |
Disclaimer: Values are approximate for cake only and do not include frosting. Individual results may vary.
Frequently Asked Questions (FAQ)
Can I use Dutch-processed cocoa powder?
Yes, Dutch-processed cocoa powder creates a darker, less acidic cake with a slightly milder chocolate flavor. It works wonderfully for this homemade chocolate cake. For a deeper dive into how different cocoa powders impact flavor and texture, consider exploring the nuances between natural and Dutch-processed options, as explained by the differences between Dutch-processed and natural cocoa powder.
Can I substitute soy milk?
Absolutely, soy milk is a suitable substitute for dairy milk in this recipe. It contributes similar fat and protein content, maintaining the cake’s moist texture.
What about sugar substitutes for diabetics?
You can use granulated sugar substitutes, but they may alter the cake’s texture and moisture slightly. Consult specific product instructions for best results in your easy chocolate cake recipe.
Can I bake this recipe in 8-inch pans?
Yes, you can use three 8-inch pans for slightly taller layers. Adjust the baking time, reducing it by a few minutes, and test for doneness carefully.
Can I add fruit to the frosting?
Certainly! Pureed raspberries or strawberries can be folded into the chocolate buttercream for a fruity twist. Ensure the puree is thick to avoid thinning the frosting too much.
Conclusion
This homemade chocolate cake recipe stands as a testament to simple, delicious baking. With its rich flavor, incredibly moist crumb, and straightforward instructions, it’s destined to become your go-to dessert for all occasions. Enjoy the satisfaction of creating this beloved classic from your own kitchen.