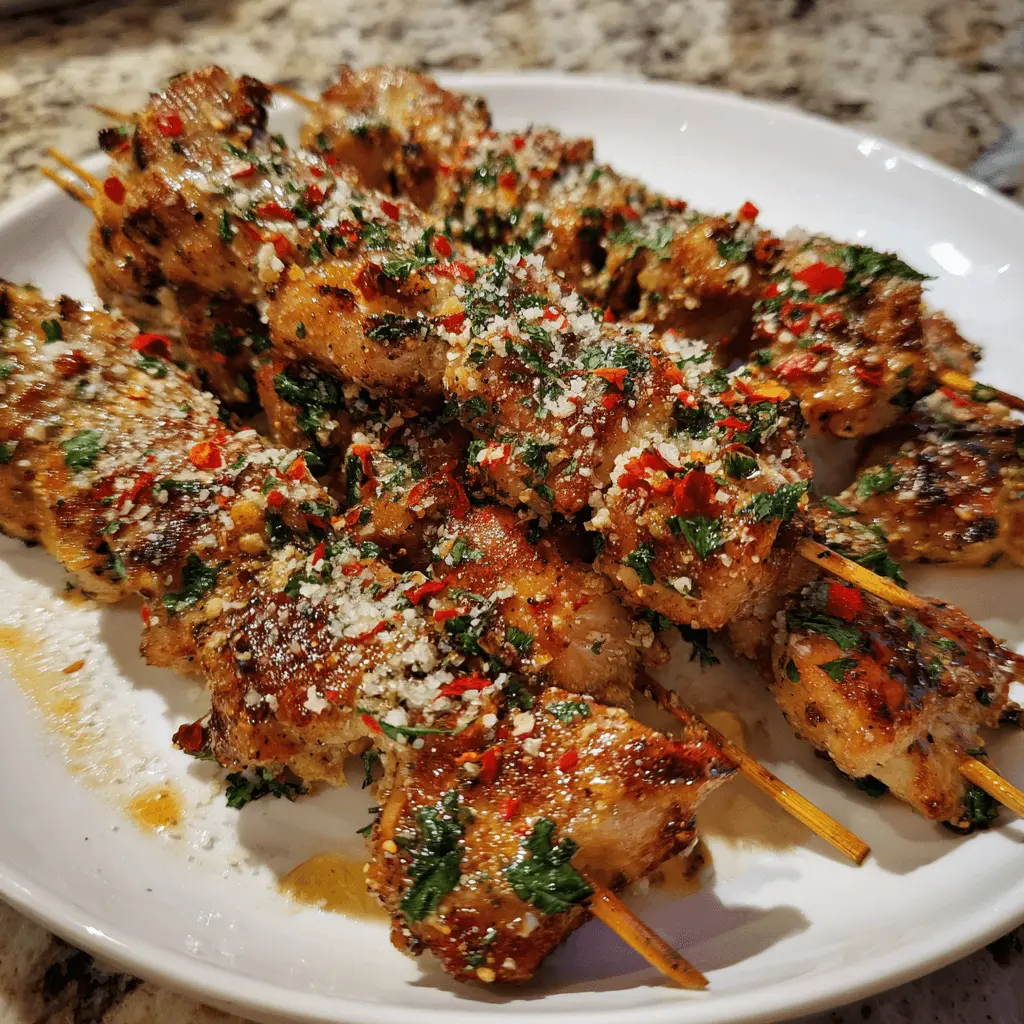
Get ready for tender, juicy chicken skewers bursting with incredible flavor! These garlic butter chicken skewers are a true weeknight hero and a guaranteed crowd-pleaser. Whether you’re looking for an easy family dinner or a delightful appetizer, this recipe delivers. You can effortlessly prepare these flavorful skewers using your air fryer, oven, or outdoor grill. It’s perfect for any home cook!
Why You’ll Love These Garlic Butter Chicken Skewers
Making these delicious skewers is a smart choice for any busy cook. Here’s why you’ll adore this recipe:
- Quick and Easy Preparation: Spend less time in the kitchen thanks to simple steps.
- Incredibly Juicy and Tender Chicken: Our method ensures perfectly cooked, moist chicken every time.
- Rich, Savory Garlic Butter Flavor: The vibrant garlic butter sauce makes every bite irresistible.
- Perfect for Any Occasion: Ideal for casual dinners, potlucks, or even meal prepping.
- Versatile Serving Options: Pair these garlic butter chicken skewers with various sides for a complete meal.
Ingredients
Gather these simple ingredients to create your mouthwatering garlic butter chicken skewers:
- 2 lbs chicken tenders, thighs or breast: Boneless, skinless chicken is best for skewers.
- 2 tbsp olive oil: Helps season and brown the chicken.
- 1 stick butter (8 tablespoons): Forms the rich base of our sauce.
- 8-10 cloves garlic, minced: Fresh garlic provides the best flavor.
- 1/2 cup Parmesan, grated: Adds a salty, cheesy depth.
- 1 tbsp hot sauce (more if desired): For a subtle warmth.
- 2 teaspoons red pepper flakes: Enhances the heat and flavor profile.
- 1/3 cup fresh parsley, minced: Adds freshness and color.
- 2 teaspoons smoked paprika: Brings a smoky depth to the chicken.
- 1 teaspoon garlic powder: Reinforces the garlic flavor in the seasoning.
- 1 teaspoon onion powder: Adds savory notes to the chicken.
- 1/2 teaspoon salt: Essential for seasoning the chicken.
- 1/2 teaspoon black pepper: Balances the spices.
Notes & Substitutions
You have flexibility with many of the ingredients. Feel free to adapt based on what you have.
- Chicken: Use boneless, skinless chicken tenders, breasts, or thighs. Cut them into uniform 1-inch cubes for even cooking.
- Garlic: Freshly minced garlic delivers the most robust flavor. However, jarred minced garlic is a convenient alternative if you’re short on time.
- Parmesan: For the best taste, opt for freshly grated Parmesan cheese. Pre-grated Parmesan works well too.
- Hot sauce: Adjust the amount of hot sauce to your preferred spice level, or omit it completely for a milder dish.
- Herbs: If fresh parsley isn’t available, you can substitute it with dried parsley. Use one-third of the amount (about 1 tablespoon dried parsley).
Equipment
Having the right tools makes preparing these chicken skewers a breeze.
- Wooden or metal skewers: If using wooden, remember to soak them.
- Large mixing bowl: For tossing the chicken with seasonings.
- Small saucepan or microwave-safe bowl: To melt butter for the sauce.
- Basting brush: Essential for applying that delicious garlic butter.
- Air fryer: Our recommended method for perfectly cooked skewers.
- Meat thermometer: Crucial for ensuring the chicken is safely cooked.
Instructions
These garlic butter chicken skewers come together quickly with our easy-to-follow steps. We’ll cover the air fryer method first, then oven and grill options.
Yields: 6-8 skewers
Prep time: 20 minutes
Cook time: 15 minutes
Prep Chicken & Skewers
- Soak wooden skewers: If you are using wooden skewers, submerge them in water for at least 30 minutes. This prevents them from burning during cooking. For optimal results, a simple technique can help prevent wooden skewers from burning during the cooking process. Learn more about preventing wooden skewers from burning.
- Prepare chicken: Pat the chicken dry with paper towels. Cut the chicken into uniform 1-inch cubes. Uniform pieces cook more evenly.
- Season chicken: In a large mixing bowl, combine the chicken pieces with olive oil, smoked paprika, garlic powder, onion powder, salt, and black pepper. Toss everything until the chicken is evenly coated.
- Thread chicken: Carefully thread the seasoned chicken pieces onto the soaked wooden or metal skewers. Pack them relatively tightly, but leave a small gap between pieces for even cooking.
Make the Garlic Butter Sauce
- Melt butter and garlic: In a small saucepan or a microwave-safe bowl, melt the stick of butter. Add the minced fresh garlic to the melted butter and stir well.
- Combine ingredients: Remove from heat (if using a saucepan). Stir in the grated Parmesan cheese, hot sauce (if using), and red pepper flakes.
- Add parsley: Finally, stir in the fresh minced parsley. Mix until all ingredients are well combined and fragrant.
- Divide sauce: Reserve about one-third of the garlic butter sauce in a separate small bowl. You will use this reserved portion for basting the cooked chicken before serving. This prevents cross-contamination.
Cook in the Air Fryer (Recommended Method)
The air fryer is fantastic for creating perfectly crispy yet juicy air fryer chicken breast skewers.
- Preheat air fryer: Preheat your air fryer to 375°F (190°C) for 3-5 minutes.
- Arrange skewers: Lightly grease the air fryer basket. Arrange the chicken skewers in a single layer in the basket, ensuring not to overcrowd it. You may need to cook in batches.
- Initial cook: Cook for 6-8 minutes.
- Flip and baste: Open the air fryer, carefully flip the skewers, and generously baste them with the remaining (not reserved) garlic butter sauce.
- Continue cooking: Continue cooking for another 6-8 minutes, or until the internal temperature of the thickest part of the chicken reaches 165°F (74°C) using a meat thermometer.
- Final baste and serve: Once cooked, remove the skewers from the air fryer. Baste them immediately with the reserved garlic butter sauce for an extra burst of flavor before serving.
Oven Instructions
No air fryer? No problem! These chicken skewers cook beautifully in the oven.
- Preheat oven: Preheat your oven to 400°F (200°C).
- Prepare baking sheet: Line a large baking sheet with foil or parchment paper for easy cleanup. Place an oven-safe wire rack on top of the lined sheet. This allows for better air circulation around the skewers.
- Arrange and bake: Arrange the prepared chicken skewers on the wire rack in a single layer. Bake for 10-12 minutes.
- Flip and baste: Flip the skewers, then generously baste them with the main garlic butter sauce. Continue baking for another 8-10 minutes, or until the chicken reaches an internal temperature of 165°F (74°C).
- Broil for browning: For a slightly golden-brown finish, you can broil the skewers for 2-3 minutes at the end. Keep a close eye on them to prevent burning.
- Final baste: Once done, remove from the oven and baste with the reserved garlic butter sauce before serving.
Grill Instructions
Grilling adds a fantastic smoky char to your garlic butter chicken skewers.
- Preheat grill: Preheat your outdoor grill to medium-high heat (about 375-400°F or 190-200°C). Lightly oil the grill grates to prevent sticking.
- Place skewers: Carefully place the chicken skewers directly over the preheated grates.
- Grill and baste: Grill for 3-5 minutes per side. Baste the skewers with the main garlic butter sauce each time you flip them.
- Cook thoroughly: Continue grilling and basting until the chicken is thoroughly cooked and reaches an internal temperature of 165°F (74°C). The total grilling time will be around 12-18 minutes, depending on your grill and chicken size.
- Serve: Remove from the grill and brush with the reserved garlic butter for an extra layer of flavor.
Pro Tips for Perfect Garlic Butter Chicken Skewers
Achieve restaurant-quality results every time with these helpful tips.
- Uniform chicken pieces: Cut your chicken into similarly sized 1-inch cubes. This ensures all pieces cook evenly.
- Don’t overcrowd: Cook skewers in batches if necessary. Overcrowding lowers the cooking temperature and steams the chicken instead of browning it.
- Monitor internal temperature: Always use a meat thermometer to check for 165°F (74°C). This prevents overcooking, keeping the chicken moist. To ensure food safety, the U.S. Department of Agriculture provides clear guidelines for cooking poultry.
- Soak wooden skewers: Remember to soak wooden skewers for at least 30 minutes. This essential step prevents them from burning, especially on the grill or in the oven.
- Tight packing: Thread the chicken pieces onto the skewers somewhat tightly. This helps the chicken retain moisture and stay juicy.
- Don’t cross-contaminate: Always use a separate bowl for the reserved basting sauce. Never re-use sauce that touched raw chicken.
Serving Suggestions, Storage & Variations
These versatile garlic butter chicken skewers pair well with many dishes.
Serving Suggestions
- Complementary grains: Serve these flavorful skewers alongside fluffy rice, protein-rich quinoa, or your favorite pasta for a complete meal.
- Fresh sides: Pair them with roasted vegetables like asparagus or bell peppers, or a crisp green salad with a light vinaigrette.
- Appetizer option: Enjoy them as a delicious appetizer, perhaps with a side of tzatziki or a creamy ranch dipping sauce.
- Utilize leftover butter: Drizzle any extra reserved garlic butter over your side dishes, like mashed potatoes or steamed broccoli, for added flavor.
Storage & Reheating
Proper storage ensures your delicious skewers remain fresh and tasty.
- Cool completely: Allow the cooked chicken skewers to cool down completely before storing them.
- Airtight container: Transfer the chicken pieces (off the skewers for easier storage) into an airtight container. Refrigerate for up to 3-4 days.
- Gentle reheating: Reheat gently in the microwave or a preheated air fryer until warmed through. Avoid overcooking during reheating to maintain moisture.
Variations
Customize your garlic butter chicken skewers to suit your taste.
- Spicy: Amp up the heat by adding more hot sauce, a pinch of cayenne pepper, or a dash of chili powder to the garlic butter.
- Lemon-Herb: Introduce a bright, zesty twist by stirring in fresh lemon juice and lemon zest along with a mix of dried Italian herbs.
- Cheesy: Sprinkle extra grated Parmesan cheese over the skewers during the last few minutes of cooking, or even add a little shredded mozzarella.
- Add veggies: Make them a complete meal by threading bell peppers, red onions, cherry tomatoes, or zucchini chunks between the chicken pieces on the skewers.
Nutrition Information
Please note that nutritional values provided here are estimates. Actual values can vary based on specific ingredients, preparation methods, and serving sizes. We recommend using a nutrition calculator with your exact ingredients for precise information. These garlic butter chicken skewers are an excellent source of protein.
| Nutrient | Amount Per Serving (estimated) |
|---|---|
| Calories | 420 kcal |
| Protein | 45g |
| Fat | 25g |
| Saturated Fat | 12g |
| Cholesterol | 160mg |
| Sodium | 580mg |
| Carbohydrates | 3g |
| Fiber | 1g |
| Sugars | 1g |
Frequently Asked Questions
Get quick answers to common questions about preparing and enjoying these skewers.
- Can I prepare garlic butter chicken skewers ahead of time? Yes, you can cut and season the chicken a day in advance. Prepare the garlic butter sauce, but keep it separate until just before cooking.
- How do I know when the chicken is cooked through? Always use a meat thermometer. Insert it into the thickest part of the chicken; it should read 165°F (74°C) for food safety.
- Can I use frozen chicken? Yes, but ensure the chicken is completely thawed before cutting and seasoning. Pat it very dry to help seasonings stick and promote b good browning.
- Why do I need to soak wooden skewers? Soaking wooden skewers in water for at least 30 minutes prevents them from burning and charring too quickly when exposed to high heat.
- What if I don’t have an air fryer? No problem! You can easily cook these delicious garlic butter chicken skewers in your oven or on an outdoor grill, following the instructions provided above.
Conclusion
These delicious garlic butter chicken skewers offer a fantastic blend of convenience and incredible flavor, perfect for busy parents and beginner cooks. With simple ingredients and clear instructions for your air fryer, oven, or grill, a tender and juicy meal is just minutes away. Get ready to impress your family and friends with these savory chicken skewers. Give this recipe a try and enjoy a truly satisfying and easy meal!