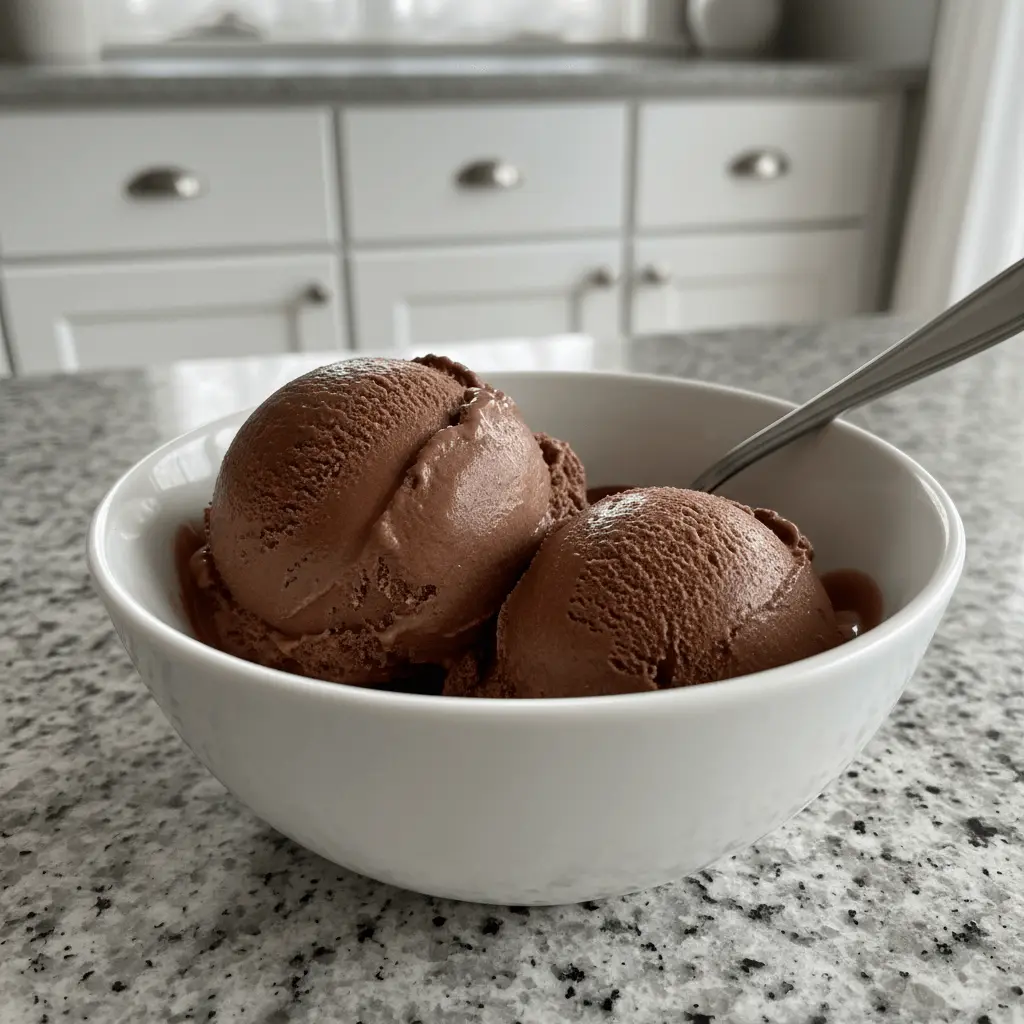
Indulge in the ultimate treat with this incredibly rich and creamy homemade chocolate ice cream recipe. Forget store-bought tubs; making your own is surprisingly easy and delivers a depth of flavor that’s simply unparalleled. With just seven simple ingredients, you can whip up a batch that will impress everyone. Prepare yourself for a dessert experience far superior to anything you’ve ever tasted from the freezer aisle.
Why You’ll Love This Chocolate Ice Cream
This isn’t just any dessert; it’s a delightful experience waiting to happen. You will absolutely adore this homemade treat for several fantastic reasons:
- Achieve an ultimate creamy texture, thanks to our careful custard base.
- Experience a deep, rich chocolate flavor that truly satisfies your sweet cravings.
- It’s made with simple, wholesome ingredients you likely have on hand.
- Perfect for special occasions, yet easy enough to enjoy any day of the week.
- Customize your creation with favorite mix-ins for a unique twist.
- Enjoy a fun and rewarding kitchen project that tastes incredible.
Ingredients
Gather your simple ingredients to create this luscious dessert. You’ll need:
- 2 cups heavy cream (divided)
- ¼ cup unsweetened cocoa powder
- 6 ounces semisweet chocolate (chopped or chocolate chips)
- 1 ½ cups whole milk
- ¾ cup granulated sugar
- ⅛ tsp sea salt
- 3 large egg yolks (beaten)
- ½ tsp pure vanilla extract
This homemade chocolate ice cream recipe uses fresh, high-quality ingredients for the best flavor.
Notes & Substitutions
Understanding the science behind these ingredients can enhance your ice cream-making skills. For more information, explore the culinary science of ice cream.
- Heavy Cream: This ingredient is absolutely essential for achieving that luxurious, creamy texture. There isn’t a direct substitute that will yield the same results.
- Cocoa Powder: Opt for a high-quality dark cocoa powder for an intensely rich chocolate flavor. Regular unsweetened cocoa also works well.
- Semisweet Chocolate: Feel free to adjust the percentage of chocolate for your desired sweetness and intensity. Dark chocolate creates a more robust flavor, while milk chocolate makes it sweeter.
- Whole Milk: Half-and-half is a suitable alternative if you don’t have whole milk on hand, providing a similar richness.
- Granulated Sugar: This ingredient is crucial for both sweetness and contributing to the smooth texture of the ice cream. There’s no effective substitute that maintains the integrity of the recipe.
- Egg Yolks: These are critical for creating the rich, creamy custard base that gives homemade ice cream its signature decadent mouthfeel. Do not skip them.
- Vanilla Extract: For an extra layer of gourmet flavor, you can substitute vanilla beans or vanilla paste.
Equipment
You’ll need a few key pieces of kitchen equipment to make this delicious chocolate ice cream recipe:
- Ice cream maker: A compressor model or a pre-frozen bowl type works perfectly.
- Saucepan: For preparing both the chocolate base and the custard.
- Fine mesh strainer: Essential for ensuring a silky-smooth custard.
- Wire whisk: For blending ingredients thoroughly and preventing lumps.
- Large bowl: To combine and cool your chocolate base.
- Freezer-friendly airtight container: For storing your finished ice cream.
Instructions
Creating this delightful homemade chocolate ice cream is a straightforward process when you follow these steps carefully. You’ll be enjoying your rich dessert in no time!
Make Chocolate Base
First, whisk together 1 cup of heavy cream and the cocoa powder in a medium saucepan. Bring the mixture to a gentle boil, then reduce the heat immediately. Simmer it for 30 seconds, whisking constantly to prevent burning. Remove the saucepan from the heat. Add the chopped semisweet chocolate and whisk until it’s completely smooth and melted. Stir in the remaining 1 cup of heavy cream until fully combined. Transfer this rich chocolate mixture to a large bowl and position a fine mesh strainer over it. Set it aside for now.
Prepare Custard
In a separate small bowl, lightly whisk together the three egg yolks. In a clean saucepan over medium heat, whisk together the whole milk, granulated sugar, and sea salt. Heat this milk mixture until it is slightly warm, but not boiling. Now, it’s time to temper the egg yolks. Slowly add about ½ cup of the warm milk mixture to the beaten egg yolks, whisking continuously. This gradually raises the temperature of the yolks without scrambling them. Pour the tempered milk and egg mixture back into the saucepan with the remaining warm milk, whisking constantly as you add it. Continue to cook the custard over medium heat, stirring the mixture constantly with a spatula. The custard will thicken and lightly coat the back of your spatula when it reaches approximately 170°F.
Combine & Chill
Once thickened, carefully pour the hot custard through the fine mesh strainer directly into the large bowl with your chocolate mixture. This step ensures an incredibly smooth and lump-free texture for your homemade chocolate ice cream. Stir the combined mixture until it is fully incorporated and wonderfully smooth. Discard any residue caught by the strainer. Add the pure vanilla extract and stir it in thoroughly. Place a lid or plastic wrap directly onto the surface of the mixture to prevent a skin from forming. Let the mixture cool completely in the refrigerator for at least 6 hours, or ideally, overnight. For faster cooling, you can place the bowl into an ice bath and stir often.
Churn & Freeze
When your chocolate ice cream base is thoroughly chilled, pour it into your ice cream maker. Churn the mixture according to your manufacturer’s instructions, typically for 30-40 minutes, until it is thick and has the consistency of soft-serve ice cream. The churning process introduces air and breaks up ice crystals, creating a smooth result. Transfer the freshly churned, soft ice cream into a freezer-friendly, airtight container. Place the container in the freezer for at least 6 hours to allow the chocolate ice cream to firm up to a scoopable consistency. Serve this incredible homemade treat and enjoy!
Pro Tips & Troubleshooting
Achieving the perfect scoop of homemade ice cream is easy with these helpful pointers.
For more in-depth solutions to common ice cream issues, consider exploring various techniques used by culinary experts for preventing ice crystals in homemade ice cream.
- Chilling is Key: Ensure your ice cream base is thoroughly chilled for at least 6 hours, or even better, overnight. Proper chilling is absolutely essential for the best possible creamy texture and allows the flavors to meld beautifully.
- Preventing Ice Crystals: To avoid an icy result, always chill your base completely before churning. Also, transfer the churned ice cream to an airtight container immediately and press plastic wrap directly onto the surface before sealing to minimize air exposure.
- Tempering Eggs: When tempering the egg yolks, add the warm milk very slowly, a little at a time, while whisking vigorously. This prevents the eggs from scrambling and ensures a smooth, rich custard for your chocolate ice cream.
- Don’t Overchurn: Stop churning your ice cream once it reaches a soft-serve consistency. Overchurning can incorporate too much air, leading to a less dense and sometimes grainy texture.
- Fine Mesh Strainer Alternative: If you don’t have a fine mesh strainer, a nut milk bag or even a clean tea towel placed over a regular colander can work to strain the custard, ensuring a silky texture.
Serving, Storage & Variations
This homemade chocolate ice cream is versatile and incredibly delicious. Here are some ideas to enjoy it fully.
Serving Suggestions
Enjoy your rich, creamy ice cream in classic cones or elegant bowls. Elevate it further with a drizzle of chocolate or caramel sauce. Add a dollop of fresh whipped cream for extra indulgence. For a fun twist, use it to make delightful ice cream sandwiches or as a layer in homemade ice cream cakes. You can also blend it into thick, decadent milkshakes.
Storage Instructions
Store any leftover homemade chocolate ice cream in a freezer-friendly, airtight container. Make sure the lid is sealed tightly to prevent freezer burn and keep it fresh. When stored properly, it will keep beautifully in the freezer for up to 2 months, ready for whenever a craving strikes.
Variations
Get creative with your chocolate ice cream recipe! Add your favorite mix-ins during the last few minutes of churning. Think edible cookie dough pieces, chopped nuts like walnuts or pecans, colorful sprinkles, crushed candies, or even fruit swirls like raspberry or cherry. Experiment with different types of chocolate in the base, such as dark chocolate for a richer flavor, or create swirls using melted white chocolate for a striking contrast.
Nutrition Information
Here is the approximate nutrition information per serving for this homemade chocolate ice cream:
| Nutrient | Amount |
|---|---|
| Calories | 340 |
| Carbohydrates | 32g |
| Protein | 5g |
| Fat | 23g |
| Saturated Fat | 14g |
| Cholesterol | 130mg |
| Sodium | 40mg |
| Fiber | 2g |
| Sugar | 27g |
Disclaimer: These values are approximate and may vary based on specific ingredients and preparation methods.
FAQ
Got questions about making this decadent chocolate ice cream? We have answers!
- How do you churn ice cream by hand (without an ice cream maker)?
Freeze your chilled base in a shallow pan for 1 hour. Beat it vigorously every 30 minutes with a whisk or electric mixer for 3-6 hours, until it reaches a creamy consistency. - How long does homemade ice cream last?
When stored in an airtight container in the freezer, your homemade chocolate ice cream recipe will stay fresh and delicious for up to 2 months. - Can I add mix-ins to this chocolate ice cream?
Absolutely! For the best results, add your chosen mix-ins during the last few minutes of churning. Edible cookie dough, chocolate chips, or crushed candy bars are fantastic additions. - Why is my homemade ice cream hard/icy?
This often happens if the base wasn’t thoroughly chilled, if there’s too little sugar or fat, or if it wasn’t stored in an airtight container. Proper chilling, sufficient fat content from cream and egg yolks, and sealing tightly are key. - What kind of ice cream maker should I use?
There are two main types: freezer bowl models, which require pre-freezing the bowl, and compressor models, which are self-freezing and ready to use anytime. Both work well for this recipe.
Conclusion
You now have everything you need to create the most incredible homemade chocolate ice cream recipe right in your own kitchen. This simple, step-by-step guide makes it easy for anyone to achieve a deeply flavorful, wonderfully creamy dessert that truly rivals any gourmet scoop. Don’t hesitate any longer; give this recipe a try and treat yourself and your loved ones to a truly special indulgence. We’d love to hear how your chocolate ice cream turned out in the comments below, so be sure to share your experience!