BEST Flourless Chocolate Cake Recipe
Get ready to bake an absolutely stunning dessert. This flourless chocolate cake recipe delivers a rich, fudgy, and intensely chocolaty experience. It’s an elegant and sophisticated treat, perfect for any special occasion or when you simply crave something truly decadent. Prepare to impress everyone with this remarkably simple yet luxurious cake.
Why You’ll Love This Flourless Chocolate Cake
- Taste: Enjoy a deeply rich and decadent chocolate flavor that is never overwhelming, striking a perfect balance.
- Texture: Experience a delightful blend of fudgy brownie, dense cake, creamy truffle, and light mousse in every bite.
- Ease: This recipe is surprisingly simple to prepare, making an impressive dessert accessible to even beginner bakers.
- Gourmet Feel: Elevate any meal with this sophisticated dessert, ideal for entertaining guests or a fancy dinner.
- Make Ahead: Prepare this elegant chocolate dessert in advance, perfect for stress-free party planning.
Ingredients
Creating this amazing flourless chocolate cake requires just a few high-quality ingredients. Each component plays a vital role in achieving its signature rich flavor and texture.
- 1 ¼ cups (213 grams) semisweet chocolate chips
- 1 stick (113 grams) unsalted butter
- ¾ cup (150 grams) granulated sugar
- 1 teaspoon instant espresso powder (optional)
- ¼ teaspoon fine sea salt
- 1 teaspoon vanilla extract
- 3 large eggs plus 1 egg yolk
- ½ cup (43 grams) Dutch-process cocoa
- ½ cup (120 grams) heavy cream, chilled
- For topping (optional): Powdered sugar, freshly whipped cream, vanilla ice cream, or a 1:1 ganache, fresh strawberries or raspberries
Notes & Substitutions
You have flexibility with your chocolate choice. Use high-quality dark chocolate (60-70% cacao) or bittersweet chocolate wafers for a more intense flavor. For cocoa powder, Dutch-process is best here because it reduces acidity, leading to a darker, milder chocolate flavor. To understand the science behind this choice, learn more about the properties of Dutch-process cocoa. Ensure your eggs are at room temperature; this helps them emulsify better with the chocolate mixture. Always use heavy cream that is well-chilled for optimal whipping.
Equipment
Gathering the right tools makes baking easier and more enjoyable.
- 8-inch round 3-inch deep cake pan
- Parchment rounds with tabs
- Digital instant-read thermometer
- Microwave-safe bowl or double boiler
- Whisk, rubber spatula
- Electric mixer or immersion blender
- Wire rack
- Sharp knife
- Fine mesh strainer
Pan Preparation Tips
Lightly grease your pan and line the bottom with a parchment round; this prevents sticking and ensures easy release. A light-colored pan bakes more evenly, preventing over-browning. You can also use an 8-inch springform pan for simpler unmolding.
Instructions
Follow these simple steps to bake your delicious and decadent flourless chocolate cake.
- Prepare Oven and Pan: Preheat your oven to 350°F (175°C). Lightly grease an 8-inch round, 3-inch deep light-colored cake pan with nonstick cooking spray. Place a parchment round on the bottom and spray again.
- Melt Chocolate and Butter: In a large microwave-safe bowl, combine the chocolate chips and unsalted butter. Heat in 30-second increments, stirring after each, until just barely melted. Stir until smooth.
- Mix Dry Ingredients: Whisk the granulated sugar, instant espresso powder (if using), fine sea salt, and vanilla extract into the melted chocolate mixture. Let this mixture cool down to room temperature.
- Add Eggs: Add the 3 large eggs and 1 egg yolk all at once. Vigorously whisk the mixture until it becomes smooth and glossy.
- Incorporate Cocoa: Whisk in the Dutch-process cocoa powder until it is just combined. Be careful not to overmix; the batter will be quite thick.
- Whip Cream: In a small but deep bowl or measuring cup, use an electric mixer or an immersion blender fitted with a whisk attachment to beat the chilled heavy cream to medium peaks.
- Fold Cream into Batter: Using a rubber spatula, gently fold the whipped cream into the thick chocolate batter until just combined. Work carefully to maintain the volume of the whipped cream.
- Fill Pan: Pour the prepared batter into your lined and greased cake pan. Smooth the top of the batter evenly with the spatula.
- Bake: Bake the cake for about 25 to 30 minutes. The cake will puff up, the edges will set, but the center will still be slightly wobbly. Use an instant-read thermometer to check for doneness; the center should read at least 200°F (93°C).
- Cool Cake: Remove the cake from the oven and place the pan on a wire rack to cool for 10 minutes. The cake will naturally deflate as it cools. While still warm, use a thin, flexible knife or offset spatula to loosen the edges of the cake from the pan. This helps with easier unmolding later.
- Chill Completely: Let the cake cool completely in the pan on the wire rack. Once fully cooled, cover the pan tightly and refrigerate for at least 6 hours, or preferably overnight. This chilling period is crucial for setting the texture.
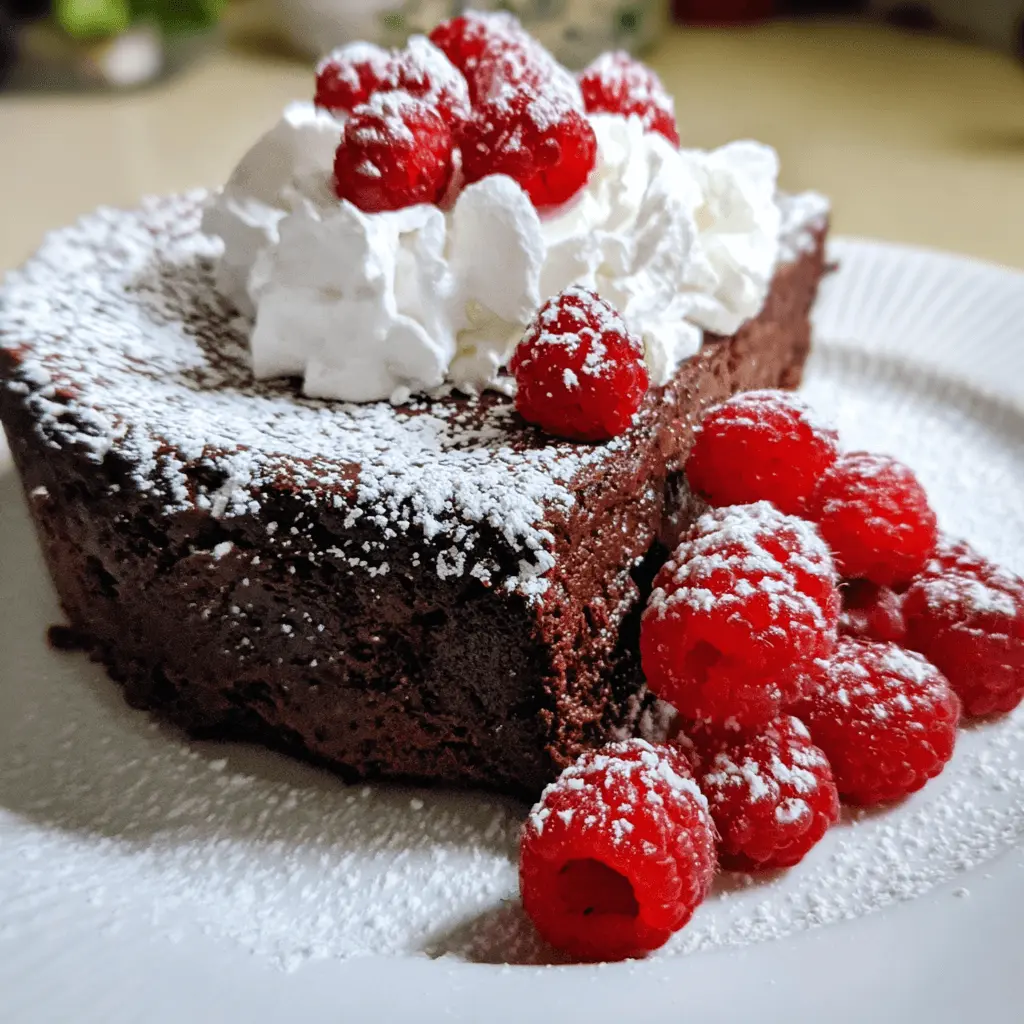
- Serve: When ready to serve, remove the chilled cake to a serving plate. For clean slices, dip a sharp knife in hot water and wipe it clean between each cut. Place a spoonful of powdered sugar in a small fine mesh strainer and dust over each slice. Garnish with freshly whipped cream, a scoop of vanilla ice cream, or fresh berries like strawberries or raspberries. Enjoy your perfect flourless chocolate cake!
Pro Tips & Troubleshooting
For a perfectly fudgy texture, avoid overbaking. The cake should still be slightly wobbly in the center when you remove it from the oven. Use your instant-read thermometer; 200°F is key for a set yet moist interior. For detailed guidance, understanding the internal temperature for cake doneness is crucial for achieving the perfect texture. The cake naturally falls and deflates during cooling; this is normal and contributes to its dense texture, not a sign of failure unless it drastically collapses from overmixing. Cooling completely and chilling overnight is essential for the fudgy texture to fully develop. Serve this cake chilled and slice it with a hot, wiped knife for clean, elegant pieces every time.
Serving, Storage & Variations
Serving Suggestions
Dust with powdered sugar or cocoa powder. Pair with freshly whipped cream, a scoop of creamy vanilla ice cream, or a rich chocolate ganache (1:1 ratio of chocolate to cream). Fresh berries like raspberries or strawberries add a lovely tart contrast, or consider a bright raspberry topping.
Storage
Store any leftover cake in an airtight container in the refrigerator for up to 3 days.
Freezing
This cake freezes beautifully! Wrap it tightly in plastic wrap, then foil, and freeze for up to 2 months.
Thawing
Thaw frozen cake in the refrigerator overnight. If needed, re-dust with powdered sugar before serving.
Nutrition
This rich dessert provides a satisfying treat. While specific values vary based on ingredients and portion sizes, a typical serving of flourless chocolate cake might contain:
| Nutrient | Amount (approx.) |
|---|---|
| Calories | 400-500 |
| Total Fat | 30-40g |
| Saturated Fat | 18-25g |
| Cholesterol | 100-150mg |
| Sodium | 50-70mg |
| Total Carbohydrates | 30-40g |
| Sugars | 25-35g |
| Protein | 5-7g |
Please use an online nutrition calculator with your specific ingredients for the most precise nutritional information.
FAQ
What does flourless chocolate cake taste like?
It’s intensely rich, deeply chocolatey, and delightfully sweet, with a dense, fudgy, almost truffle-like texture.
Is flourless chocolate cake gluten-free?
Yes, by definition, this cake contains no flour, making it a naturally gluten-free dessert.
What kind of chocolate should I use?
High-quality semi-sweet, dark, or bittersweet chocolate (60-70% cacao) works best for optimal flavor.
What cocoa powder should I use?
Dutch-process cocoa powder is recommended as it provides a darker color and a milder, less bitter chocolate flavor.
How will I know when the cake is baked?
The edges will be set and slightly puffed, but the center will have a slight wobble. Use an instant-read thermometer to confirm the center reaches 200°F (93°C).
Why does flourless chocolate cake fall after baking?
It’s completely normal! This cake is supposed to deflate, contributing to its signature dense and fudgy texture.
Do I really have to wait to eat this cake?
Yes, chilling is crucial. It allows the cake to fully set, developing its desired fudgy texture and intense flavor.
Should flourless chocolate cake be refrigerated?
Absolutely. Due to its dense, rich nature and lack of flour, refrigerating ensures optimal texture and extends its freshness.
How far in advance can I make this cake?
You can prepare this cake up to 3 days in advance and keep it covered in the refrigerator.
Can you freeze flourless chocolate cake?
Yes, it freezes wonderfully. Wrap it tightly and store it in the freezer for up to two months.
Conclusion
This flourless chocolate cake is truly a showstopper. Its rich, fudgy, and intensely satisfying flavor makes it an elegant dessert that never disappoints. You don’t need to be an expert baker to create this impressive treat. Follow these simple steps and indulge in a genuinely decadent experience. Share your delicious creation with #RoseStayon and spread the joy of simple, delicious baking!