Welcome to the wonderful world of homemade bread! Mastering a sour dough recipe might seem intimidating, but it is incredibly rewarding. This easy-to-follow guide will walk you through each step, making the process simple and enjoyable. Get ready to bake a delicious, crusty loaf that will impress everyone, proving that even beginners can bake incredible sourdough bread.
Why You’ll Love This Sour Dough Recipe
This approachable sourdough bread recipe is designed with simplicity and success in mind. It demystifies the process, making it perfect for busy parents and first-time bakers alike. You will love how effortlessly you can create a beautiful, rustic loaf with a deeply satisfying flavor and chewy texture.
- Beginner-Friendly: Clear, step-by-step instructions ensure success from your very first try.
- Minimal Effort: Active prep time is surprisingly short, allowing the dough to do most of the work.
- Time-Saving: With a flexible schedule, this recipe fits into even the busiest days.
- Delicious Results: Enjoy a perfectly crusted loaf with an airy, flavorful crumb.
- Rewarding Experience: There is immense satisfaction in baking your own artisan bread at home.
Essential Ingredients for Your Sour Dough Recipe
Creating this fantastic sour dough recipe starts with quality ingredients. Each component plays a vital role in developing that signature tangy flavor and beautiful texture. You will find that simple ingredients transform into something truly extraordinary.
Discover how the benefits of higher protein bread flour in sourdough contribute to superior gluten development, better oven spring, and a desirable chewy texture.
- Active Starter: 50–100 g (1⁄4–1/2 cup) bubbly, active starter. Using 100 grams generally speeds up fermentation. An active starter is crucial for the dough to rise properly.
- Warm Water: 375 g (1 1/2 cups plus 1 tbsp) warm water. Adjust slightly based on your flour and environment; aim for water around 90–95°F (32–35°C).
- Bread Flour: 500 g (4 cups plus 2 tbsp) bread flour. Bread flour has a higher protein content, which gives your loaf structure.
- Fine Sea Salt: 9 to 12 g (1.5–2.5 teaspoons) fine sea salt. Salt is essential for flavor and regulating fermentation. Start with 10g and adjust to your taste.
Notes & Substitutions:
Ensure your starter is robust and active; it should float in water and have many bubbles. While bread flour is ideal, you can experiment with a blend including whole wheat or spelt for different flavors. Avoid iodized salt; fine sea salt works best.
Equipment You’ll Need
Having the right tools makes preparing this sour dough recipe even easier. You likely already own most of these items, proving that delicious homemade bread does not require fancy gadgets.
- Large mixing bowl
- Damp towel or plastic wrap
- Bench scraper (optional but helpful)
- 8-inch (20-cm) bowl or proofing basket (banneton)
- Dutch oven or heavy-bottomed pot with a lid
- Parchment paper
- Wire cooling rack
Step-by-Step Instructions for Your Sour Dough Recipe
Follow these clear steps to create a beautiful, delicious loaf. This sour dough recipe breaks down each stage, making it simple for even first-time bakers. Patience is key, and the results are incredibly worth the wait.
- Combine Ingredients: Whisk the active starter and warm water together in a large bowl until well combined. Add the bread flour and fine sea salt. Mix everything with a fork or spatula until a rough dough forms. If needed, finish mixing by hand to incorporate all the flour.
- First Rest (Autolyse): Cover the bowl with a damp towel or plastic wrap and let the dough rest for 30 minutes. This initial rest allows the flour to fully hydrate.
- Perform Stretch and Folds: After 30 minutes, perform your first set of stretch and folds. Grab a portion of the dough, pull it up, and fold it into the center. Rotate the bowl a quarter turn and repeat this action 4 to 5 times until you have gone all the way around the dough. Cover and let rest for another 30 minutes.
- Repeat Stretch and Folds: Repeat the stretching and folding action. Ideally, perform this twice more for a total of four times over 2 hours. Even one series of folds significantly benefits the dough, so do not worry if you cannot complete all four.
- Bulk Fermentation (First Rise): Cover the bowl with a towel. Let the dough rise at room temperature, typically 8 to 10 hours at 70°F (21°C). In warmer environments, this could be less, sometimes as little as 6 hours. The dough is ready when it has increased by roughly 50% in volume, shows a few bubbles on the surface, and jiggles slightly when you move the bowl. Rely on visual cues over strict timing.
- Pre-Shape the Dough: Gently coax the dough onto a lightly floured surface. To pre-shape, fold the top of the dough down to the center, turn the dough, and repeat this motion until you have formed a rough round. Use a bench scraper to gently push and pull the dough to create surface tension. Let the dough rest seam side up for 30 minutes.
- Prepare Proofing Basket and Final Shape: While the dough rests, line an 8-inch bowl or proofing basket with a clean towel and dust it generously with flour (rice flour works well as it does not burn). Using your hands or a bench scraper, shape the dough again as described in step 6. Place the round into your lined bowl, seam side up.
- Cold Proof (Second Rise): Cover the dough and refrigerate it for at least 1 hour, or up to 48 hours. A longer cold proof, ideally 24 hours, often leads to a more complex flavor and better crumb structure. For extended proofing, place the bowl in a loosely tied plastic bag to prevent the dough from drying out.
- Preheat Oven and Dutch Oven: When ready to bake, place your Dutch oven with its lid into your oven. Preheat the oven to 550°F (290°C) for at least 30 minutes. Meanwhile, cut a piece of parchment paper to fit your baking pot.
- Score and Bake: Place the parchment paper over your proofed dough and invert the bowl to release the dough. Using a small, sharp knife or razor blade, score the dough with your desired pattern (a simple “X” is effective). Carefully use the parchment paper to transfer the dough into the preheated Dutch oven.
- Bake Covered: Lower the oven temperature to 450°F (230°C). Cover the Dutch oven and bake for 30 minutes.
- Bake Uncovered: Remove the lid, lower the temperature to 400°F (200°C), and continue baking for another 10 to 15 minutes. For an extra crispy crust, you can carefully remove the loaf from the Dutch oven and bake it directly on the oven rack for the final 5 to 10 minutes.
- Cool Completely: Transfer the baked loaf to a wire rack and let it cool for at least 1 hour before slicing. This cooling period is crucial for the crumb to set and for optimal flavor development.
Pro Tips & Troubleshooting for Your Best Sour Dough Recipe
Even with a straightforward sour dough recipe, a few tips can elevate your baking, and knowing how to troubleshoot common issues will build your confidence.
Understanding the fundamental science behind sourdough starters reveals how these living cultures contribute to the bread’s unique flavor and texture.
- Active Starter is Key: Always ensure your starter is bubbly and passes the float test before you begin. A weak starter results in a flat loaf.
- Visual Cues Over Time: Especially during bulk fermentation, rely on your dough’s appearance. It should increase by 50% in volume, not necessarily double, for optimal oven spring.
- Hydration Adjustments: Environmental factors like humidity affect dough. If your dough feels too stiff, add a splash more water; if it is too sticky, a little extra flour can help.
- Cold Proof Benefits: A longer cold proof (24+ hours) significantly enhances flavor and makes the dough easier to handle.
- Scoring Matters: A good score allows the dough to expand predictably in the oven, preventing uncontrolled cracks. Practice with a sharp razor blade.
Serving, Storage, and Variations
This versatile sour dough recipe yields a loaf perfect for many uses. Learn how to store it properly to maintain freshness and explore simple ways to customize your next bake.
Serving Suggestions
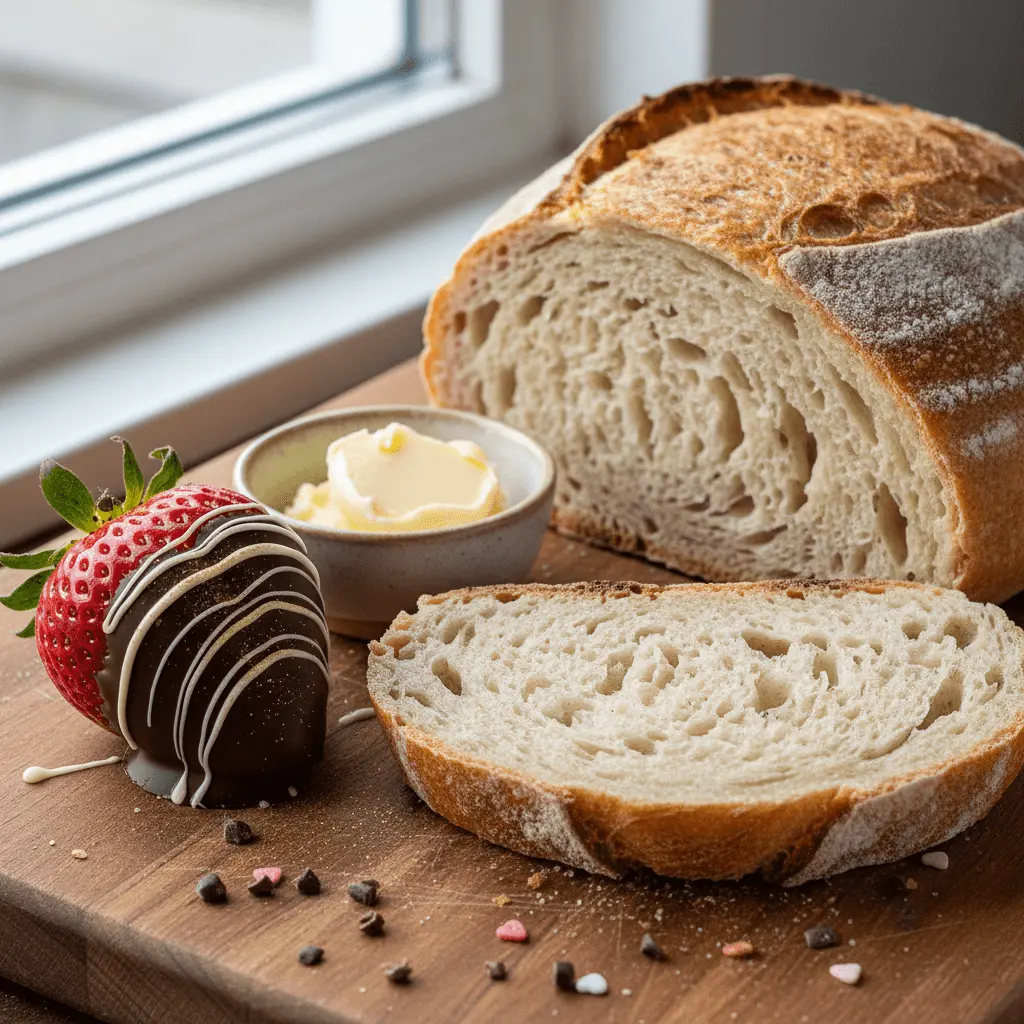
Enjoy thick slices with butter and jam for breakfast, alongside a hearty soup for lunch, or as the base for avocado toast. It also makes an incredible grilled cheese sandwich or a fantastic accompaniment to any meal.
Storage
Store your cooled loaf at room temperature in an airtight plastic bag or container for up to 3 days. For longer storage, slice the loaf and freeze individual slices. You can then toast them directly from frozen. This bread freezes beautifully for up to 3 months.
Variations
- Herb & Garlic: Knead in 2 tablespoons of chopped fresh rosemary and 2 cloves of minced garlic during the first set of stretch and folds.
- Cheese: Add 1/2 cup shredded sharp cheddar or Gruyere during the final shaping.
- Seeds: Incorporate 2 tablespoons of mixed seeds (sesame, poppy, sunflower) into the dough or sprinkle on top before baking.
Nutrition Information
Making your own sourdough means you control the ingredients, resulting in a wholesome and satisfying bread. This sour dough recipe provides complex carbohydrates and fiber.
| Component | Amount (per slice, estimated) |
|---|---|
| Calories | 150-180 kcal |
| Carbohydrates | 30-35 g |
| Protein | 5-7 g |
| Fat | 1-2 g |
| Fiber | 2-3 g |
Note: Nutritional values are approximate and can vary based on specific ingredients and serving size.
Frequently Asked Questions
Have questions about your sour dough recipe? Here are answers to common beginner queries. These insights will help you bake with confidence and tackle any challenges.
Q: What if my starter is not active enough?
A: Feed your starter more frequently (every 12 hours) with fresh flour and water until it consistently doubles within 4-6 hours. Using a healthy, active starter is the single most important factor for a successful loaf.
Q: Why is my dough so sticky and hard to handle?
A: Stickiness can be due to high hydration or not enough gluten development. Try performing extra stretch and folds, or slightly reduce the water next time. Using rice flour on your hands and surfaces also helps manage sticky dough.
Q: Can I bake this without a Dutch oven?
A: Yes, you can. You can use a pizza stone or heavy baking sheet, but create steam by placing a tray of water on the bottom rack. The Dutch oven helps trap steam, which gives sourdough its signature crust.
Q: How do I know when bulk fermentation is truly done?
A: Focus on a 50% increase in volume, not just bubbles. The dough should feel airy and show signs of structure. A straight-sided container marked at your starting volume can make monitoring this crucial stage much easier.
Conclusion
Baking your first sour dough recipe is a memorable experience that brings incredible joy and a delicious reward. This guide provides all the simplicity and clear instructions you need to achieve a beautifully crusted, flavorful loaf at home. Embrace the process, trust your instincts, and enjoy the journey of creating your own artisan bread. Happy baking!